Go to the Index of all the lessons in How to Buy an Engagement Ring.
Wondering how to read a diamond certificate? Specifically how to read a GIA report? This article shows step by step, easily, how to read a GIA certificate for a diamond.
Quick Links to Contents on This Page
You don’t need to be an expert
You don’t need to be an expert in how to read diamond certificate.
You just need to understand how to read a simple diamond report. (Also called a diamond certification.)
A GIA diamond report / certificate is designed to give you most of what you need to know about a diamond in order to make a good decision.
It’s not difficult, as you follow my easy lesson below, which is complete with a GIA sample lab report / certificate.
Lesson Objective: You’ll be able to read any GIA diamond grading report when you finish this lesson.
How to Read the GIA Natural Diamond Grading Report Section

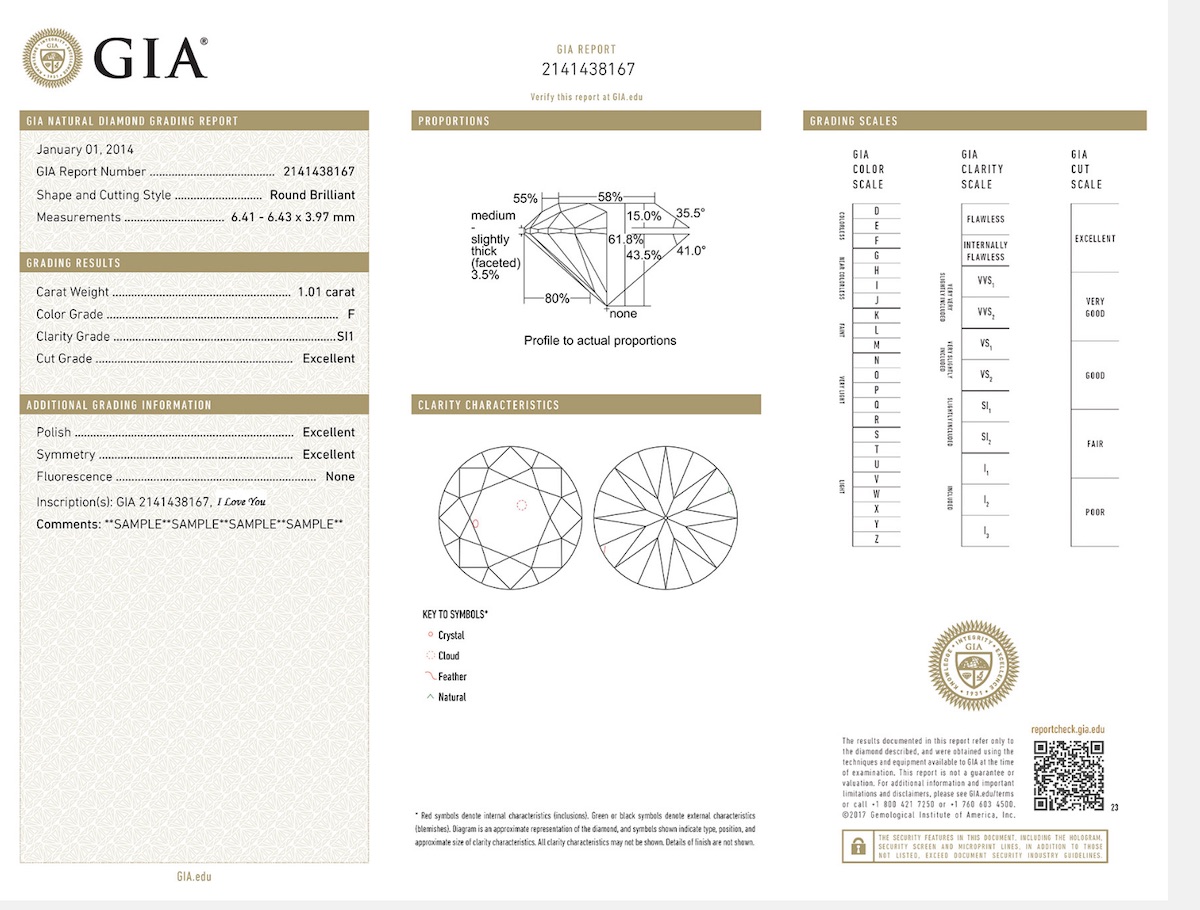
- Open this link to a GIA diamond grading report in another tab or window. (Or follow along with the image clip details I’ve included in this lesson.)
- Look on the left side of it and find the date. (Illustration #2, above.)
- Look beneath the date to find GIA Report Number. That’s a unique i.d. number for that diamond. (Illustration #2, above.)
- Find the Shape and Cutting Style of this diamond. (Illustration #2, above.) “Round” is the basic shape of the diamond. “Brilliant” is the cutting style. The cutting style has to do with the number and location of the facets. (“Brilliant” is a cutting style with 58 facets, designed to maximize brilliance.)
How to Read the “Grading Results” Section of a GIA Diamond Grading Report / Certificate
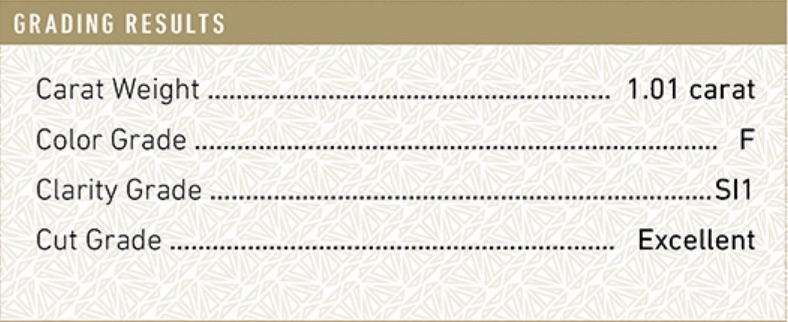
- Look in the section labeled Grading Results. (Illustration #3, above.) It’s on the left, just below the basic info. This is perhaps the most important section of the entire certificate.
- What is the Carat weight of this diamond?
- What is the Color grade of this diamond? What letter grade do you see there?
- Now look on the right side of the certificate to find the Color Grade Scale. (Illustration #4, below.) This is the key to the color grades. What do you notice about the first, best color grade? It’s a D, isn’t it? That’s surprising to many people who are first learning to shop for a diamond. We naturally expect the first letter in the scale to be an A. But it is D. (When the GIA’s objective Color grading scale was first widely adopted in the 1940s, it had to contend with many long-existing inconsistent diamond Color grades of “A,” “B,” and “C.” The GIA sidestepped all that confusion by starting their new Color grade scale at D.)
- What is the Clarity grade of this diamond? (Illustration #3, above.) Do you see that it is something called “SI1”? (That’s the letter S, the letter I, and the numeral 1. Pronounced “ESS-EYE-ONE”.)
How to interpret the grading scales

- Now look at the GIA Clarity Scale on the right side of the report. (Illustration #4, above.) “Flawless” is at the top. That’s easy to understand. At the other end is “I3” (The letter I and the numeral 3.) “I” stands for “Included”. “3” means it’s the 3rd (and the worst) level of “Included.” What does “Included” mean? “Included” is diamond jargon for “flawed.” (An “inclusion” is a diamond jargon noun for a “flaw.”)
- You’ve seen that the Clarity grade of this diamond is “SI1.” Look on the right side, to find the GIA Clarity Scale. (Illustration #4, above.) What does “SI1” stand for? Is SI1 high clarity, low clarity, or somewhere in the middle?
How to read the Clarity Characteristics diagram

- Now look in the middle, at the bottom of the report, to find the Clarity Characteristics diagram. (Illustration #5, above.) This is where you will find any “inclusions” (flaws) documented.
- What are the four kinds of “inclusions” (flaws)?
- Finally on Clarity, read the asterisk information at the bottom of the certificate, just below the Clarity Characteristics diagram. What do red symbols indicate? What do green or black symbols indicate? Good. Now you understand how to read the information about Clarity in a GIA diamond grading report / symbol.
- Under the section Grading Results on the left side of the certificate, What is the Cut Grade of this diamond? (Click to jump to Illustration #3, above. Then hit your back button to come right back to this location on the page.)
- Now look on the far right side of the report to find the GIA Cut Scale. (Click to jump to Illustration #4, above. Then hit your back button to come right back to this location on the page.) Read the five grades, beginning with Excellent, and descending to Poor.
- The “Cut” quality of a diamond is highly complex. The first thing to note is that Cut quality is not shape. The Shape of this diamond is Round. So what is “Cut”? In simple terms, Cut quality is how well-proportioned, how symmetrical the shape and the facets are. If the Cut quality is Excellent, the diamond will sparkle with much brilliance. If the Cut quality is poor, the diamond will seem dull and lustreless. Cut quality determines how well the diamond catches light from all sides, then sends it through the top of the diamond. (This is what causes brilliance and fire.)
- Cut quality is impossible for anyone except an expert to objectively and accurately predict brilliance from it. It’s too complex. For diamonds which do receive a Cut quality grade from the GIA, we can (and must) rely on the GIA.
- Please note that not all diamonds get a Cut quality grade. Most shapes of diamonds can’t get a cut grade, because cut is so complex that it hasn’t been objectively worked out for most shapes. Cut has been well studied for Round Brilliant diamonds, by far the most popular diamonds for engagement rings.
- For diamonds without a Cut quality grade, we have the pleasure of doing it the old-fashioned way: by observing the amount of brilliance and fire of the diamond. A well-cut diamond necessarily creates brilliance. Brilliance in a diamond necessarily means it’s well cut.
How to read the “Proportions” section of a GIA diamond certificate

Locate the Proportions diagram of this GIA diamond grading report / certificate. (Illustration #6, above.) It’s in the middle, at the top.
The GIA provides precise information about all these measurements. But how are you supposed to read it, or understand what it means? Or what to do with it?
The proportions diagram is interesting. It’s important as documentation. The GIA report is basically a diamond’s I.D., after all.
But the Proportions section is not all that useful, except to a very few highly quantitative and aesthetically experienced experts.
There are much better ways for evaluating a diamond. Even for any quants out there.
Think about it: no one cares about the measurements of a beautiful person or of a diamond; we care about how a person or a diamond looks to our eye.
So, you can easily evaluate a diamond by looking at it. Knowing the percentages is interesting but not very useful unless you’re a special kind of quant. Instead:
- Notice its brilliance and fire.
- Notice its aesthetic form.
- Compare and contrast it to many similar diamonds over the course of a few minutes. (Use James Allen or Blue Nile for the best imaging in the business.)
- You’ll easily develop your taste and understand which diamonds please you, and which do not.
One way the Proportions section is so useful to ordinary people.
If you’re not quite sure whether a diamond is symmetrical, you can look at the percentages in the Proportions section of its GIA diamond certificate. The numbers will tell the tale, even if your eye is unsure.
How to read the “Additional Grading Information” section
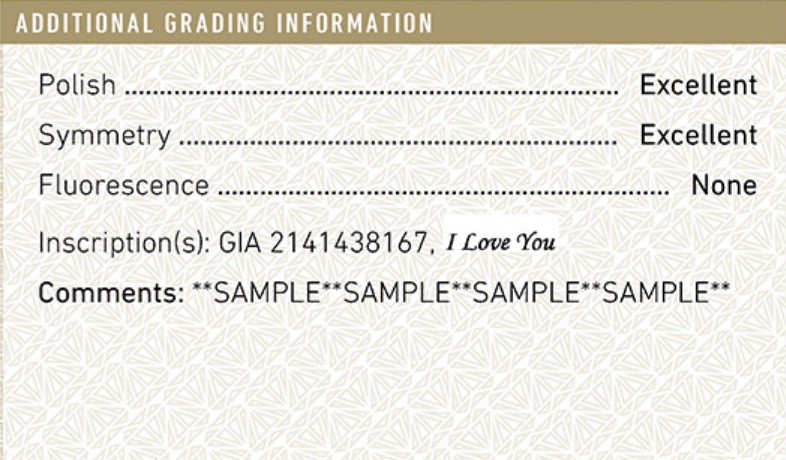
- Now look on the left side of the GIA diamond grading report / certificate, under the section labeled Additional Grading Information. (Illustration #7, above.)
- Under Additional Grading Information, how is Polish rated for this diamond? Polish refers to how well the facets were polished after cutting.
- How is Symmetry rated for this diamond?
- Does this diamond have any Fluorescence? Some diamonds glow a little under UV light, or in sunlight.
- What is inscribed on this diamond, besides the I.D. number?
How to read the security and authenticity section
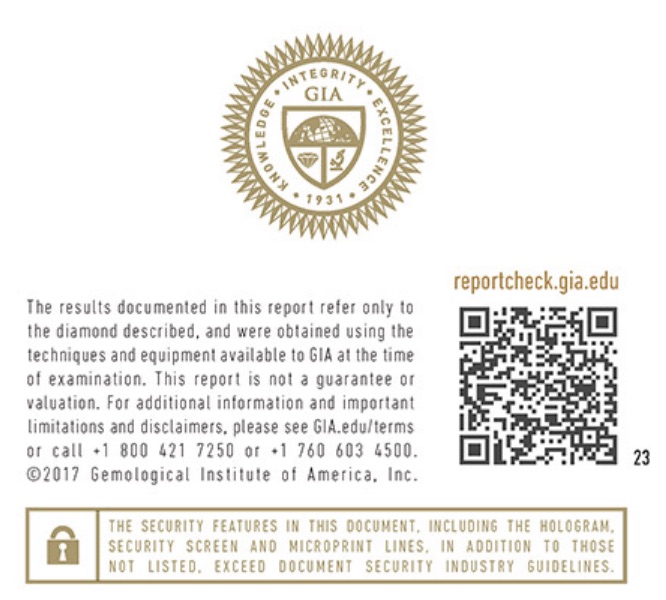
This part is pretty self-explanatory. (Illustration #8, above.) The QR code lets you look up the certificate to authenticate it.
I never use the QR code for that. (Conceivably, it could be faked and take you to some fake authentication. But that’s not really my concern as I’ve never heard of that, and it would be kind of out there.)
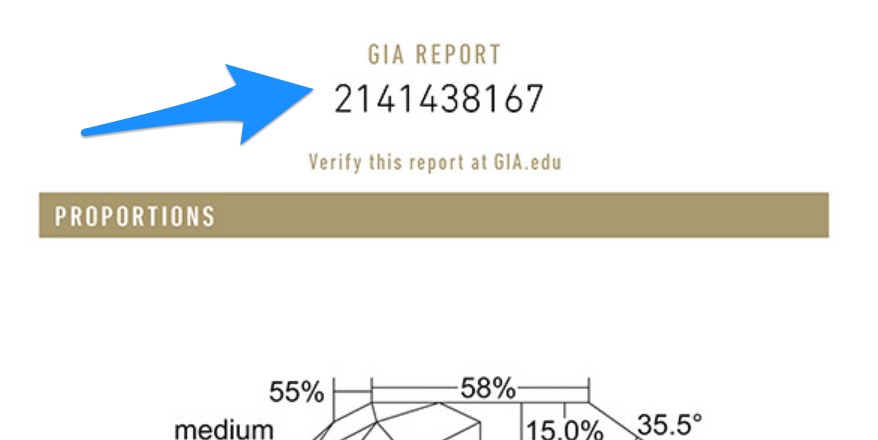
I just grab the code at the top of the diamond report. (Illustration #9, below.)
And I plug that code into the GIA Report Verification. Go ahead and check the number of the report we’ve used in this lesson. (Here it is so you can just copy and paste. 2141438167
Conclusion: That wasn’t intimidating
You’ve learned that it’s not intimidating at all. You’ve walked through a real GIA lab report.
Now you’re armed with the fundamentals to begin shopping for diamonds on your own, without giving up all your power to a salesperson, or to a diamond concierge.
Why I’m not covering AGS diamond certificates in this course
What about diamond grading reports / certificates from the American Gem Society (AGS)?
Well … the GIA is really the gold standard. AGS is useful and they are highly trusted.
(I’m not saying anything negative about grading reports from labs other than the GIA and AGS, but I will say that you should rely only on the GIA and AGS. Then you know for a fact that you’re dealing with the best of the best. Plus, the GIA is by far the most common.)
I’ve designed this course to be a quick course, teaching you everything you need to know to buy a diamond you love at the budget (or under it) that you’ve decided on.
Going into detail about yet another diamond certificate (the AGS version) would just take up more of your time.
Lessons 1 and 2 were about giving you fundamental safety rules. Everything fun has fundamental safety rules. Buying a diamond does too. Now that you’ve got those down, we’re going to have some fun.
So, I decided to skip a detailed lesson on reading an AGS diamond certificate.
And to get on to much more fun stuff, like Lesson 3: A Systematic Way to Organize Your Search for a Diamond, and Make it Enjoyable and Successful, not Overwhelming.
NEXT: In Lesson 3 of the course How to Buy a Diamond, you’ll learn:
- What characteristic of diamonds to start with. The 4Cs? Price? Shape? Proportions? The setting? All the other dozens of characteristics?? I’ll show you exactly how to prioritize.
- How to make a spreadsheet to track which diamonds you’re considering. (You can even just copy mine.)
Continue on now to enjoy this full, free, online course.
You’re going to get a better diamond. And have some left over for the honeymoon.
You can go to the Index for “How to Buy a Diamond” and choose Lesson #3.
Or just jump straight to Lesson 3. [Link to come]